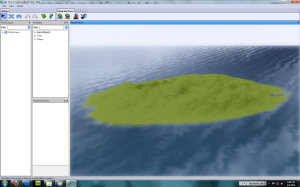
Tools: Photoshop CS4, Sims 3 Create a World Tool
Overview:
Here’s a quick tutorial for making a height map in Photoshop CS4. (You can also apply this tutorial for other image editing programs like GIMP). I initially decided to do this for EA’s latest software release, “The Sims 3 Create a World Tool – Beta” and several other reasons; including the fact that players would normally have to wait for worlds from EA, but we all know that Custom Content drives the game now. To make your own world, you need to either use their predefined maps, or just make your own. After a while, using what they give you on default makes all the worlds look all the same.
I suggest that you have a 3D rendering program so you can view how your map is coming out each step of the way. This will make for much easier editing.
So here goes nothing…
Tutorial:
- To start your map, go to File > New… > and input the proper specifications.Here are the default image sizes that can be used in Sims 3:
- Large is 2048px x 2048px
- Medium is 1024px x 1024px
- Small is 512px x 512px
- Tiny is 256px x 256px
- Once you’ve created the new image file, fill the entire background black (#000000) using the bucket tool. If you’re colors aren’t set to the default Black Foreground and White background, I suggest you set it that way now.

- Now we begin creating the various land heights. Click the lasso tool and make a “circular” or “oval” shape. This will depict the land mass.

- Right click where you outlined your shape and select Feather… Type in a number between 25 and 250. The higher the number the farther the gradient will go and the less height that area of land will have. Play around with the feathering to get the desired “falloff” you want. Click OK when you’re ready.

- Right-click your lassoed area and go to Fill… Select Background Color and click OK. This will create your first land mass.

- Next is to go to Filter > Render > Clouds. This will create variation on your land mass and give it multiple heights.

- Repeat steps 3 to 5 on various parts of your land mass to adjust it to your liking. You can also use the paint tool to manually create these areas, just make sure that your hardness setting is on zero and you have your opacity level set low; this is much faster than having to use your erase tool later.

- Lastly, save your image as a .PNG (must be 16bit) in a directory you can find easily and load it into World Creator to start preparing it for use in the Sims 3! Tutorial on world creation coming soon!
- Final Result!!!

If one or more of my tips, tutorials, or mods have helped you or have been used by you, and you wish to contribute to my website, you may use the PayPal link on my website, LESSTHANTHR33. Every contribution to my site is supportive for my continuous research into programming, modeling, and design and encourages me to develop more solutions and custom creations free of cost!
